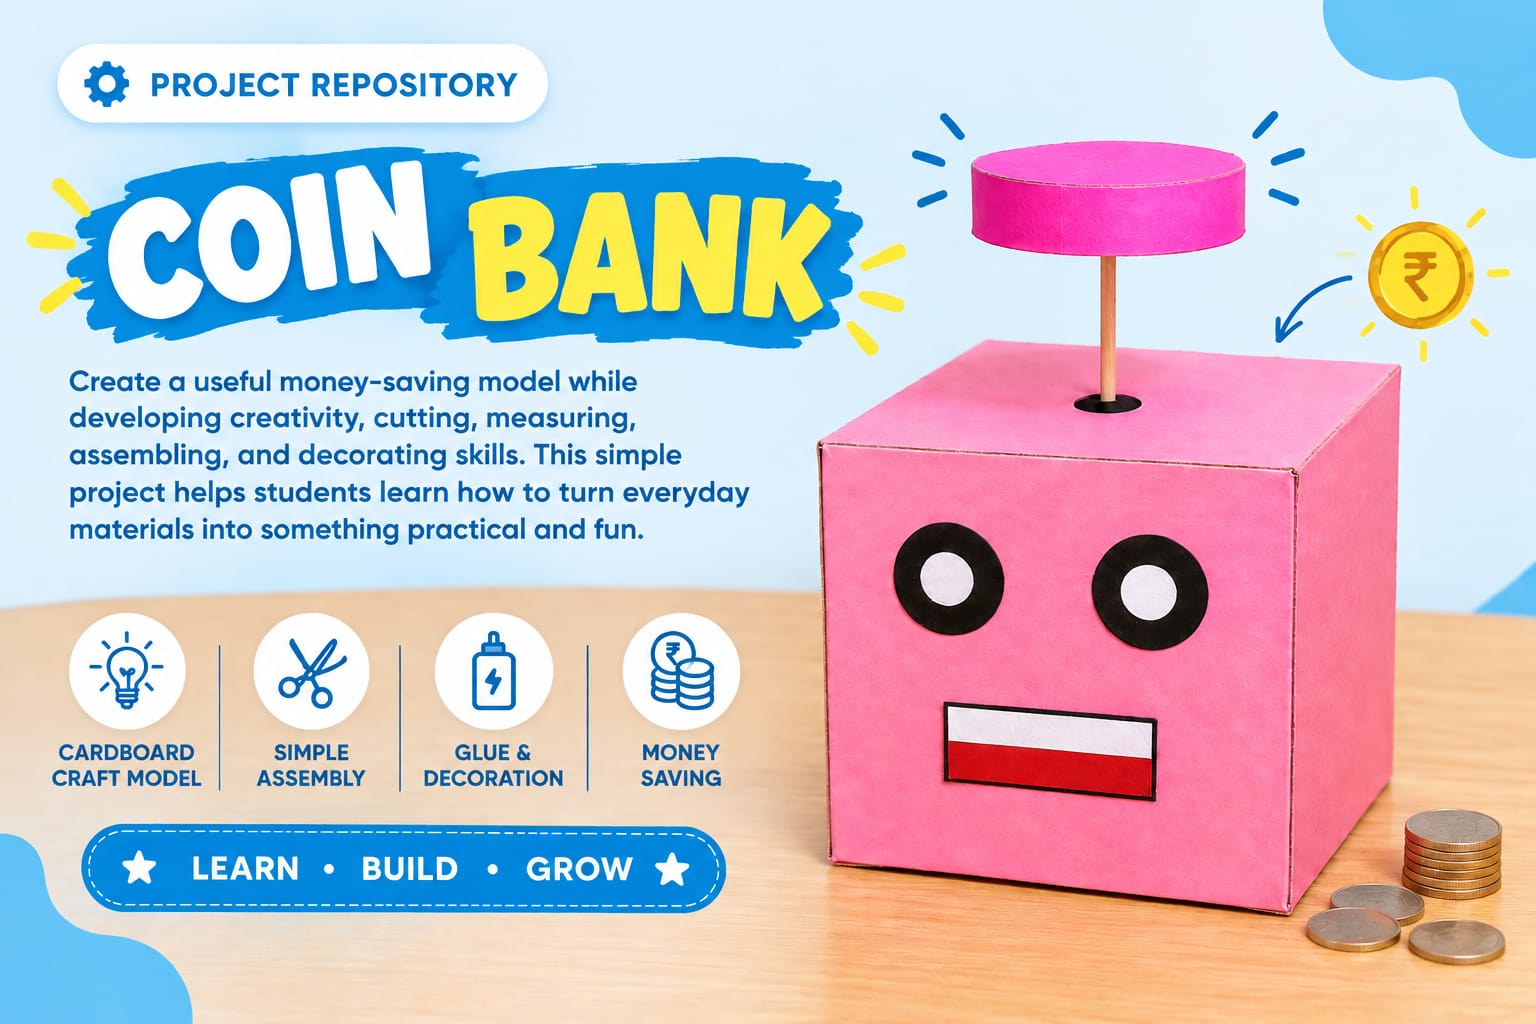
DIY BEGINNER PROJECT NO.09 (COIN BANK)

Coin Bank | Project Repository
PROJECT REPOSITORY

Coin Bank – Save Today, Smile Tomorrow! 🩡

Design and build a simple Coin Bank using cardboard, coloured paper, glue, sticks, and decorative materials. This project helps students create a useful money-saving model while developing creativity, cutting, measuring, assembling, and decorating skills.

Note: Please read the full instructions before making the product.

Category

DIY Craft Project

Level

Beginner

TABLE OF CONTENTS

AIM

To design and build a simple Coin Bank using cardboard, paper, glue, sticks, and decorative materials. The project helps students create a useful money-saving model while developing creativity, cutting, measuring, assembling, and decorating skills.

OBJECTIVE

This project introduces students to the basics of:

  • Measuring and cutting cardboard
  • Creating a simple box-shaped structure
  • Joining different cardboard pieces
  • Making a movable/openable section
  • Using sticks as a simple mechanical support
  • Fixing circular pieces to create a handle/knob
  • Reusing simple materials to create a useful product
  • Developing creativity through decoration
  • Understanding the importance of saving money

MATERIALS PROVIDED

Material Quantity / Purpose
Cardboard For the Coin Bank structure
Coloured Paper For decoration
Glue / Fevicol / Glue Gun For joining pieces
Sticks For the movable mechanism
Coins For the Coin Bank
Scissors / Cutter For cutting
Colours / Sketch Pens For decoration

PROCEDURE

Follow the steps below carefully to assemble the Coin Bank.
STEP 1

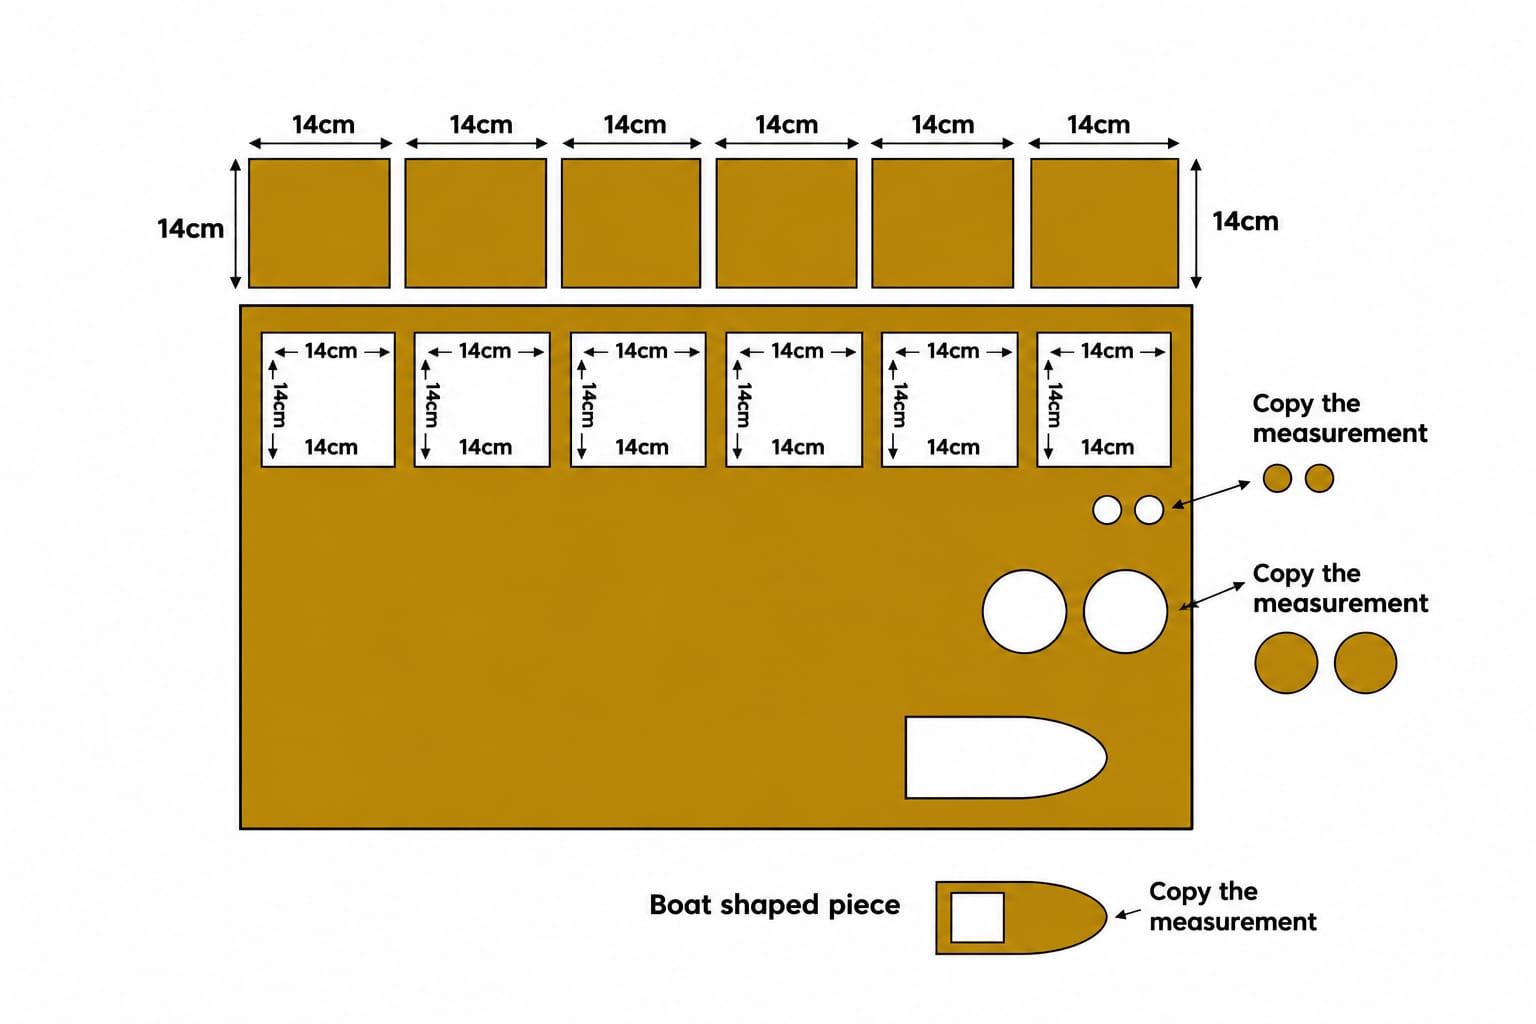
PREPARE THE CARDBOARD PIECES

  • Take a cardboard sheet.
  • Cut the required cardboard pieces according to the given design.
  • Keep all the pieces ready before starting the assembly.
  • Make sure the pieces are properly measured and cut.

πŸ’‘ TIPS

  • Measure each piece carefully before cutting.
  • Keep all the cardboard pieces together and identify them before assembly.

πŸ”„ ALTERNATIVES

  • Thick cardboard can be used to make the Coin Bank stronger.
  • Foam board or thick thermocol can also be used for the main structure.

Step 1. Prepare the Cardboard Pieces
STEP 2

PREPARE THE FRONT AND BASE

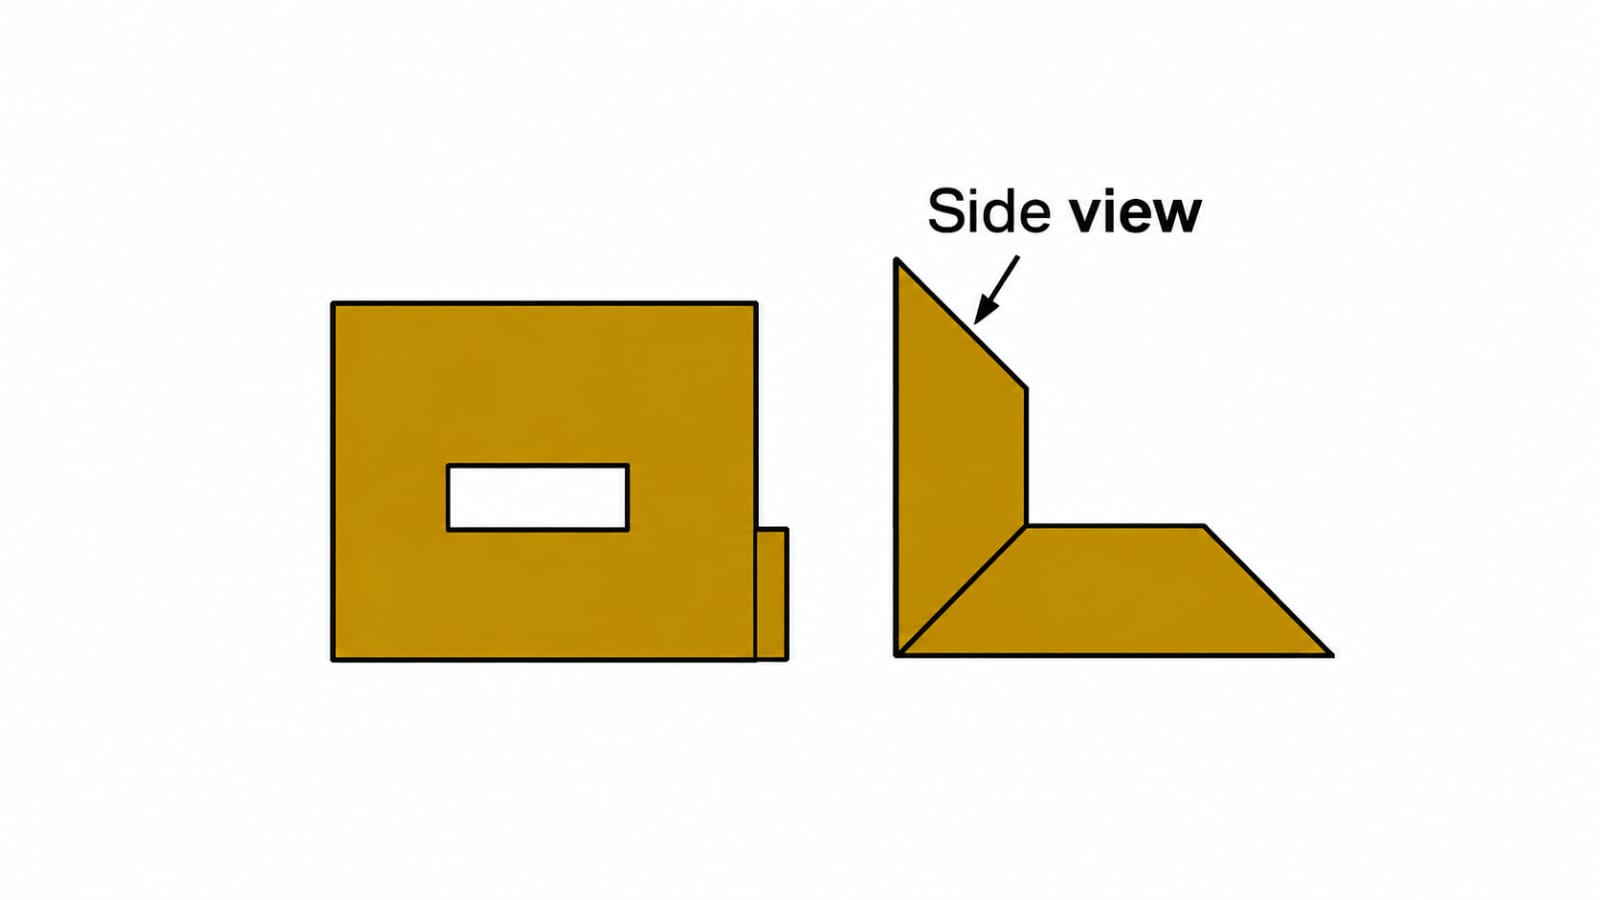
  • Take the 14 cm Γ— 14 cm cardboard pieces.
  • Use one piece as the base of the Coin Bank.
  • Use another piece as the front portion.
  • Make a small square-shaped cut at the centre of the front piece.

πŸ’‘ TIP

  • Mark the centre of the cardboard before making the square cut.
  • Keep the cut neat so that the moving portion can fit properly.

πŸ”„ ALTERNATIVES

  • A rectangular opening can be used instead of a square opening, depending on the design.
  • Decorative paper can be pasted around the opening to give it a neat finish.

Step 2. Prepare the Front and Base

STEP 3

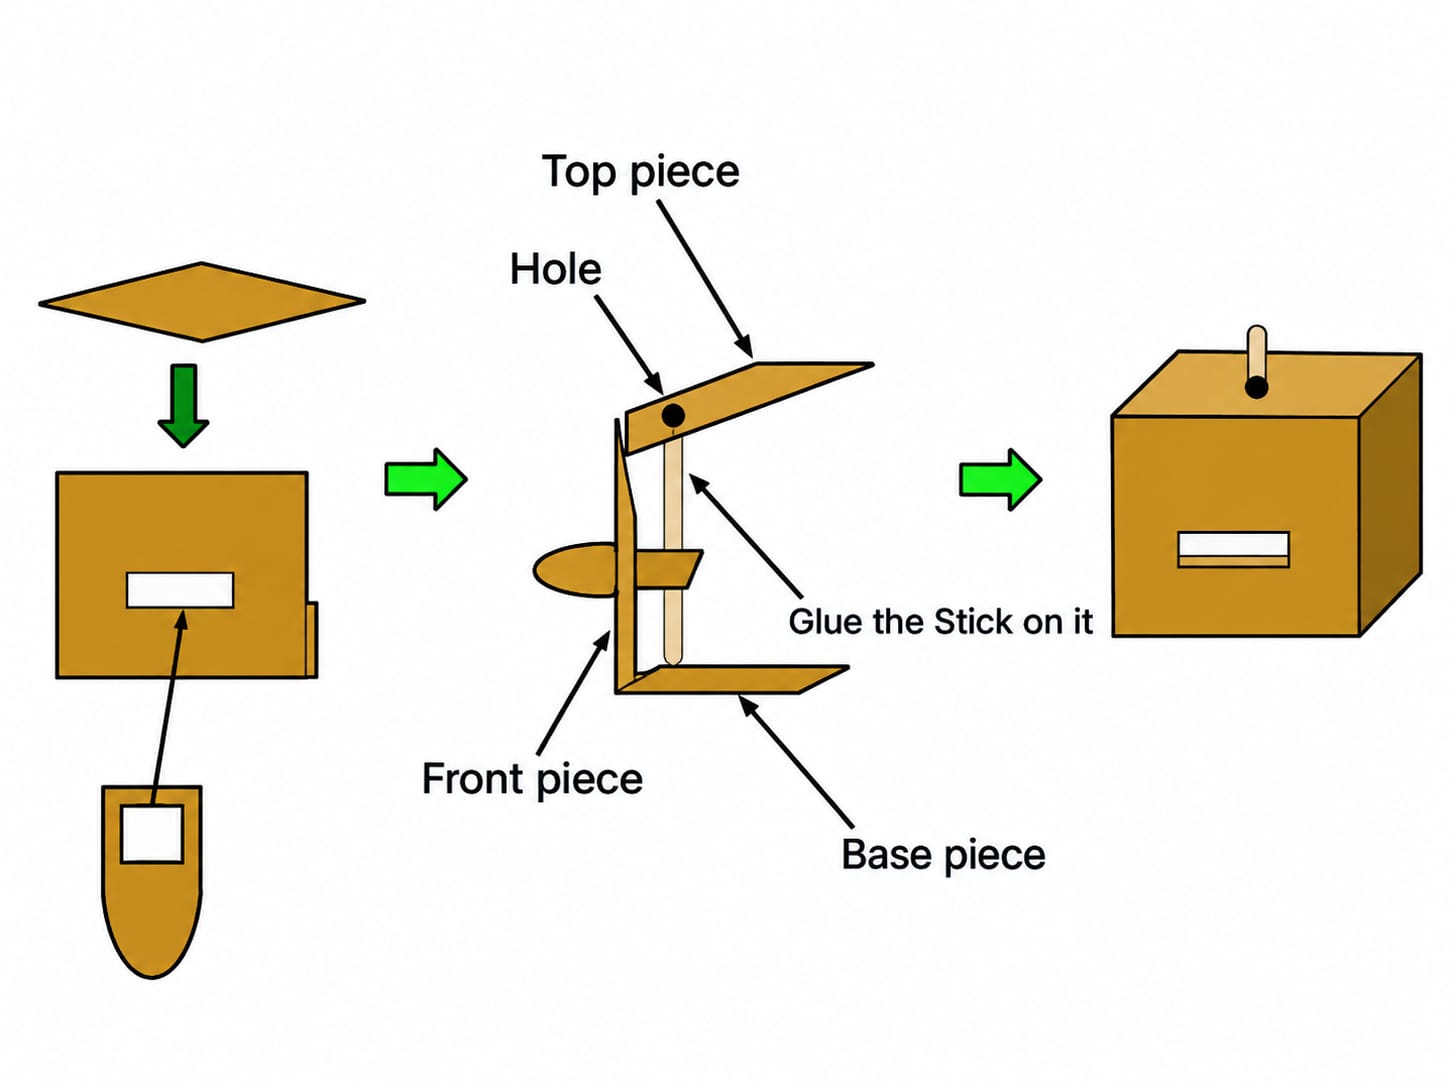
ATTACH THE BOAT-SHAPED PIECE

  • Take the boat-shaped cardboard piece.
  • Partially insert it into the square opening in the front piece.
  • Apply glue carefully to hold it in position.
  • Take the 14 cm Γ— 14 cm top piece and fix it in place.
  • Attach a stick to the tip of the boat-shaped piece.
  • Make sure the stick comes out through the hole provided in the top piece.

πŸ’‘ TIPS

  • Check that the stick can move freely before the glue dries.
  • Apply glue only where required so that the moving part is not stuck completely.

πŸ”„ ALTERNATIVES

  • A small wooden stick or sturdy paper roll can be used instead of a cardboard stick.
  • A slightly larger opening can be made if the stick does not move smoothly.

Step 3. Attach the Boat-Shaped Piece

STEP 4

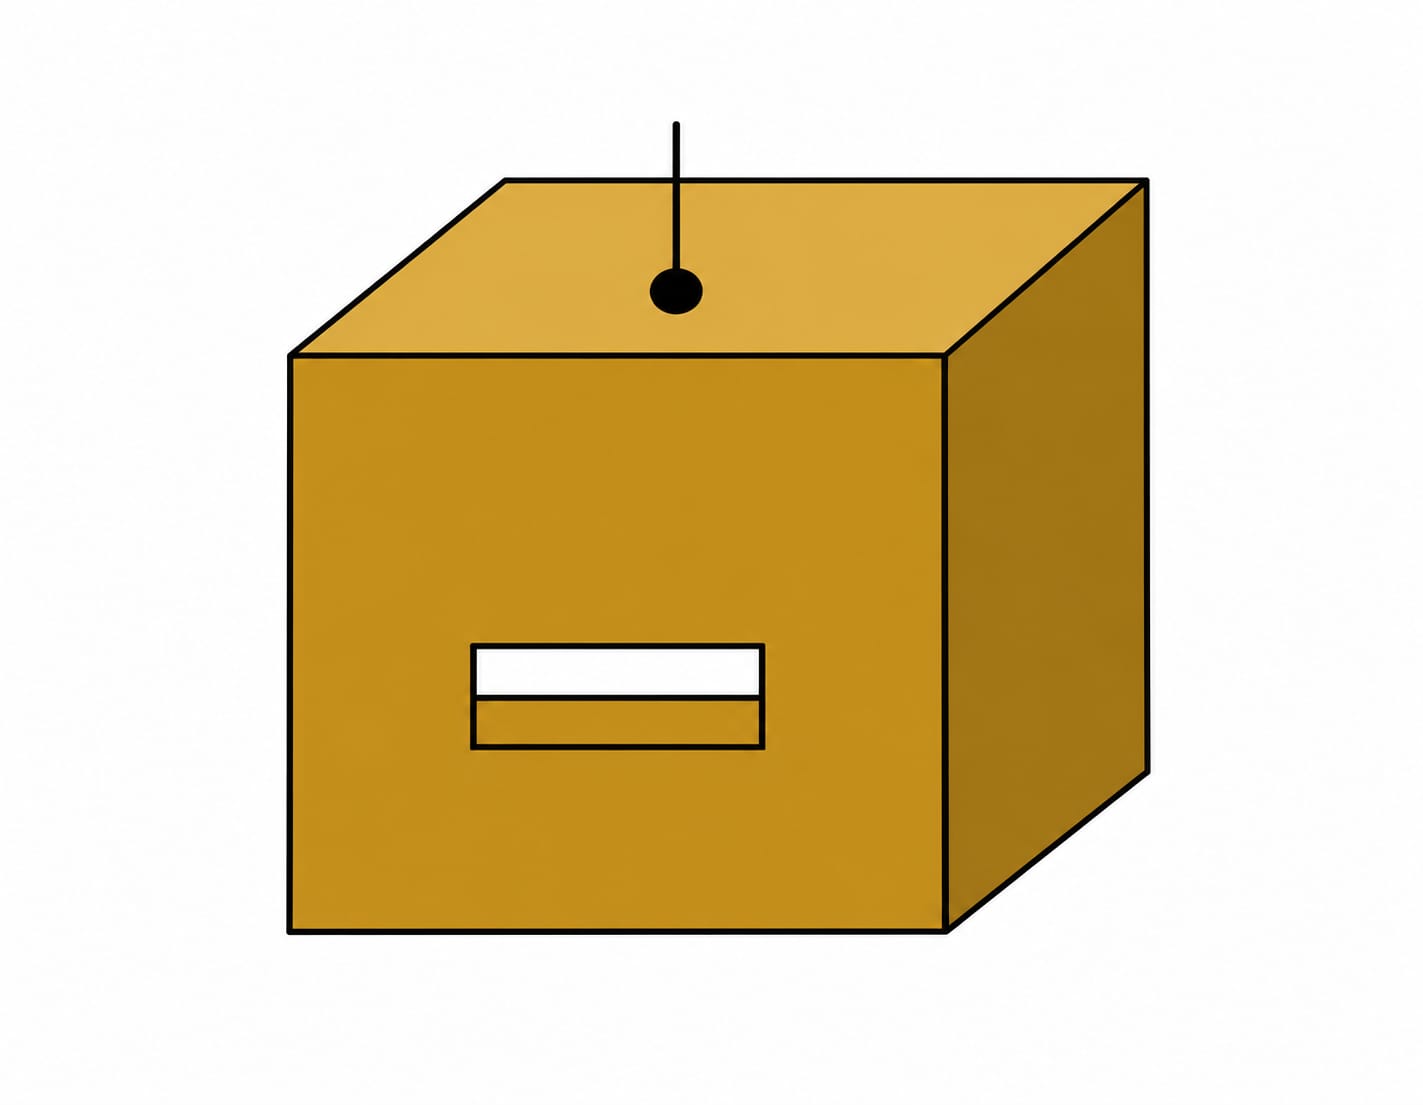
ASSEMBLE THE COIN BANK BODY

  • Join the cardboard pieces together.
  • Apply glue along the sides and edges.
  • Fix the pieces carefully to form a square/box-shaped Coin Bank.
  • Hold the pieces firmly until the glue sets.
  • Allow the structure to dry properly.

πŸ’‘ TIPS

  • Check that all corners are properly aligned before the glue dries.
  • Use small amounts of glue to avoid making the cardboard wet or weak.

πŸ”„ ALTERNATIVES

  • Double-layer cardboard can be used for a stronger body.
  • Paper tape or masking tape can be used along the inside edges for additional support.

Step 4. Assemble the Coin Bank Body

STEP 5

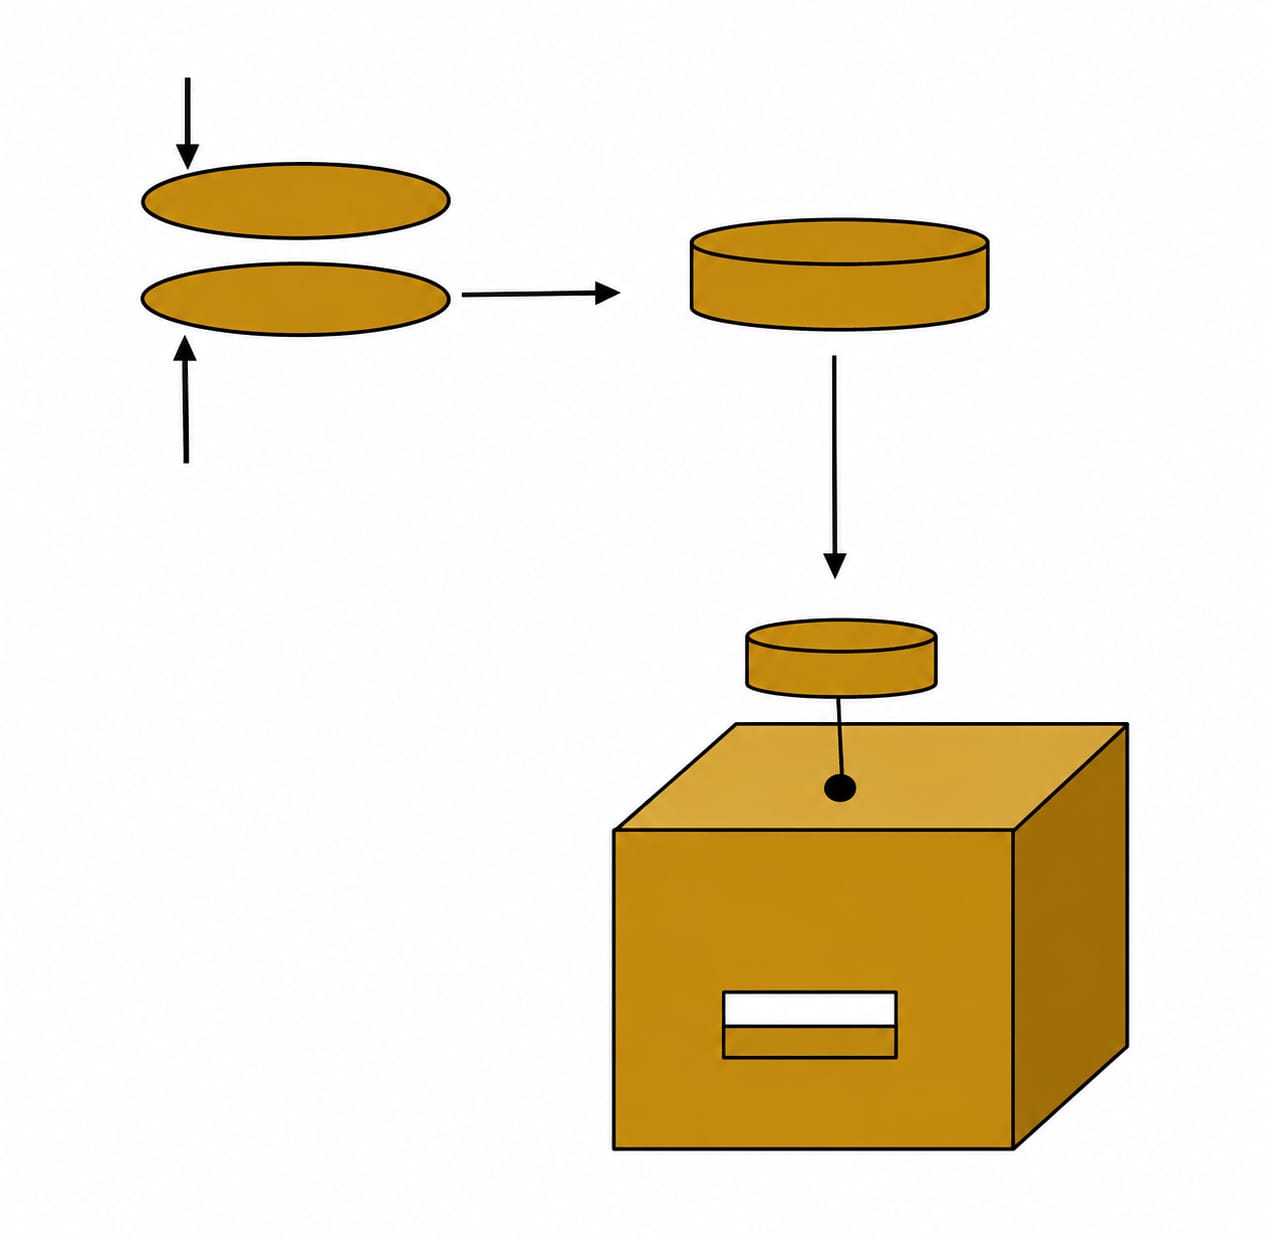
ATTACH THE LARGE CIRCULAR PIECES

  • Take the two large circular cardboard pieces.
  • Combine the two circular pieces together.
  • Apply glue between them to make them stronger.
  • Fix the combined circular pieces to the top of the stick.
  • Make sure they are firmly attached.

πŸ’‘ TIPS

  • Keep the two circles properly aligned before the glue dries.
  • Allow the glue to dry completely before moving the stick.

πŸ”„ ALTERNATIVES

  • Coloured paper can be pasted over the circular pieces for decoration.
  • A slightly thicker cardboard circle can be used for a stronger handle.

Step 5. Attach the Large Circular Pieces
STEP 6

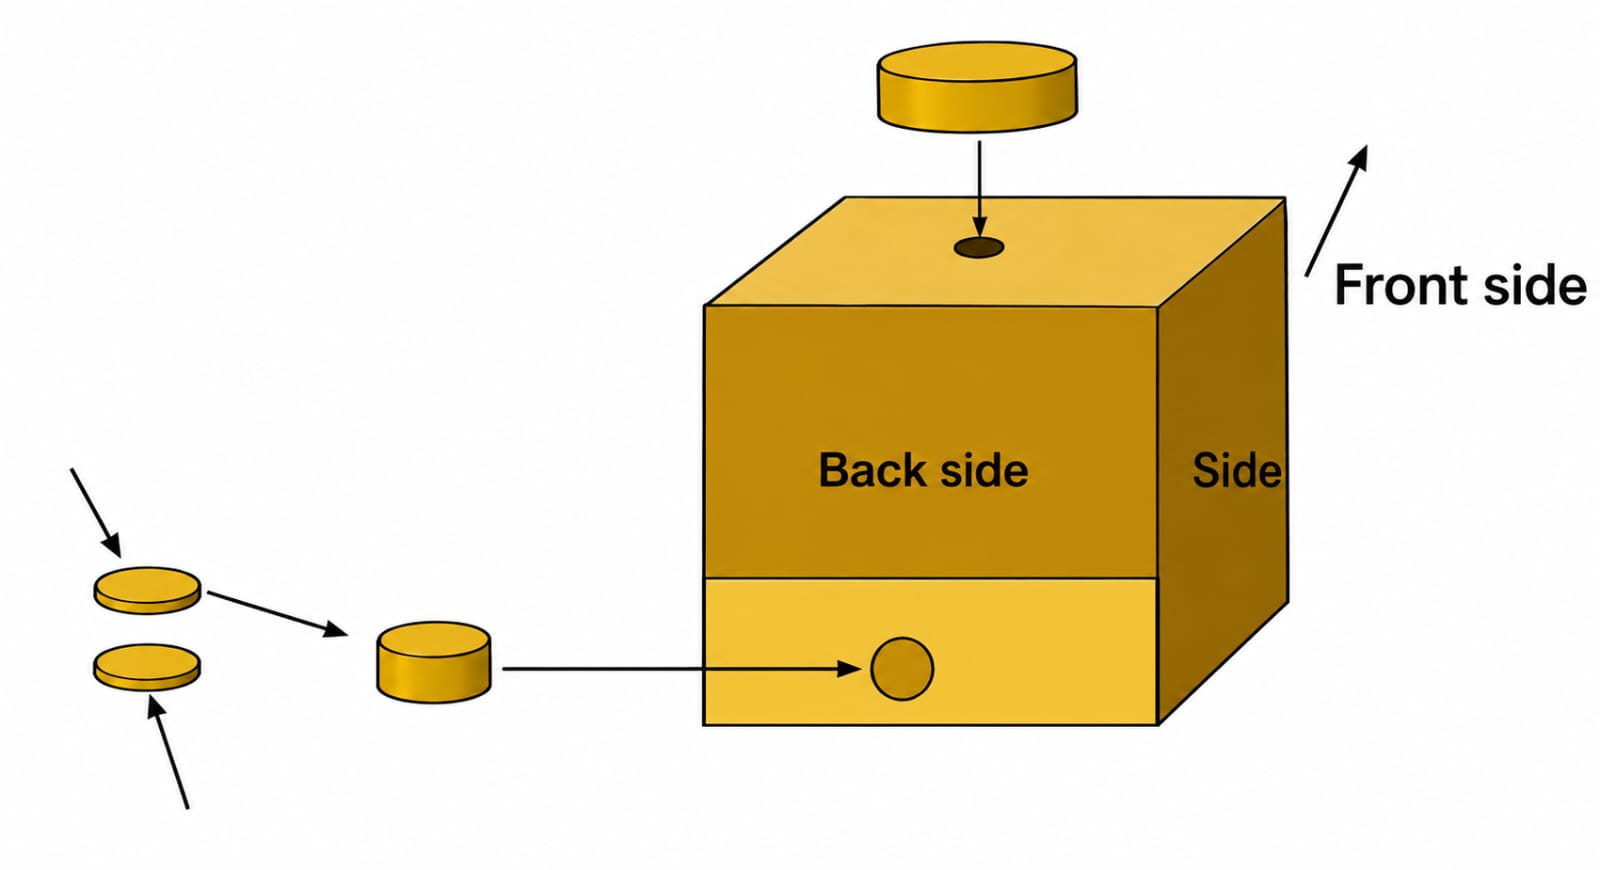
MAKE THE OPENABLE BOTTOM SECTION

  • Turn the Coin Bank upside down.
  • Carefully make a partial cut on the back/bottom piece to create an openable section.
  • Take the two small circular cardboard pieces.
  • Combine the two small circles and glue them together.
  • Fix the combined circular piece to the bottom of the openable section.

πŸ’‘ TIPS

  • Do not cut the bottom piece completely; leave one side attached so it can open and close.
  • Check that the opening is large enough to remove the saved coins easily.

πŸ”„ ALTERNATIVES

  • A simple paper-tab closure can be added to make opening and closing easier.
  • A small cardboard flap can be made instead of the partially cut section.

Step 6. Make the Openable Bottom Section
STEP 7

DECORATE THE COIN BANK

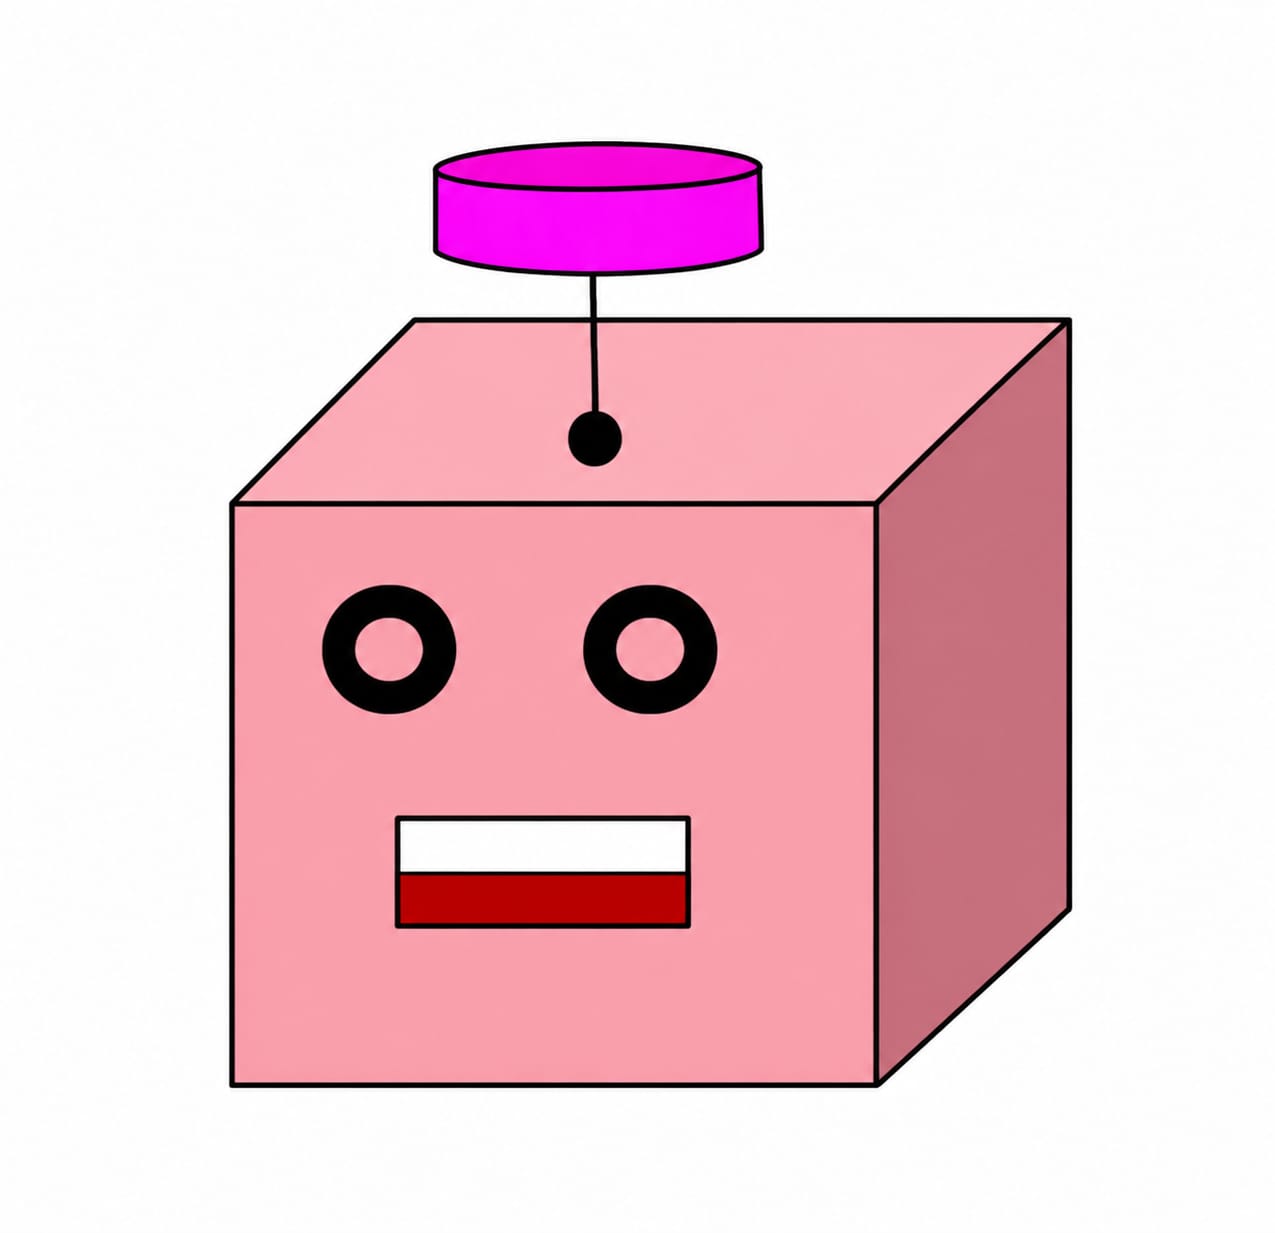
  • Decorate the Coin Bank using coloured paper, colours, or sketch pens.
  • Add patterns, borders, shapes, or drawings.
  • Write a suitable title such as β€œMY COIN BANK” or β€œSAVE MONEY”.
  • Make sure the decoration does not block the moving parts or opening section.

πŸ’‘ TIPS

  • Use different colours and patterns to make the Coin Bank attractive.
  • Keep the decoration neat and avoid adding too much weight to the structure.

πŸ”„ ALTERNATIVES

  • Use stickers, coloured tape, paper shapes, or recycled craft materials for decoration.
  • Create a themed Coin Bank such as a house, animal, robot, or cartoon character.

Step 7. Decorate the Coin Bank

WORKING PRINCIPLE

The Coin Bank works as a simple storage model for keeping coins safely inside a cardboard structure. Coins can be placed into the Coin Bank through the designated opening, while the movable stick and top section form part of the model’s interactive design. The openable bottom section allows the saved coins to be removed when required. The project demonstrates how simple cardboard pieces can be measured, cut, joined, and arranged to create a useful functional model.

πŸ’‘ THIS PROJECT DEMONSTRATES

  • Simple cardboard construction
  • Measuring and cutting
  • Joining and assembling materials
  • Simple movable mechanisms
  • Reuse of craft materials
  • Creative product design
  • The importance of saving money

FINAL RESULT

A functional and decorative Coin Bank is created using cardboard, paper, glue, sticks, and simple craft materials.

The completed model provides a creative way to collect and store coins while helping students develop practical making and design skills.

SAMPLE OUTPUT

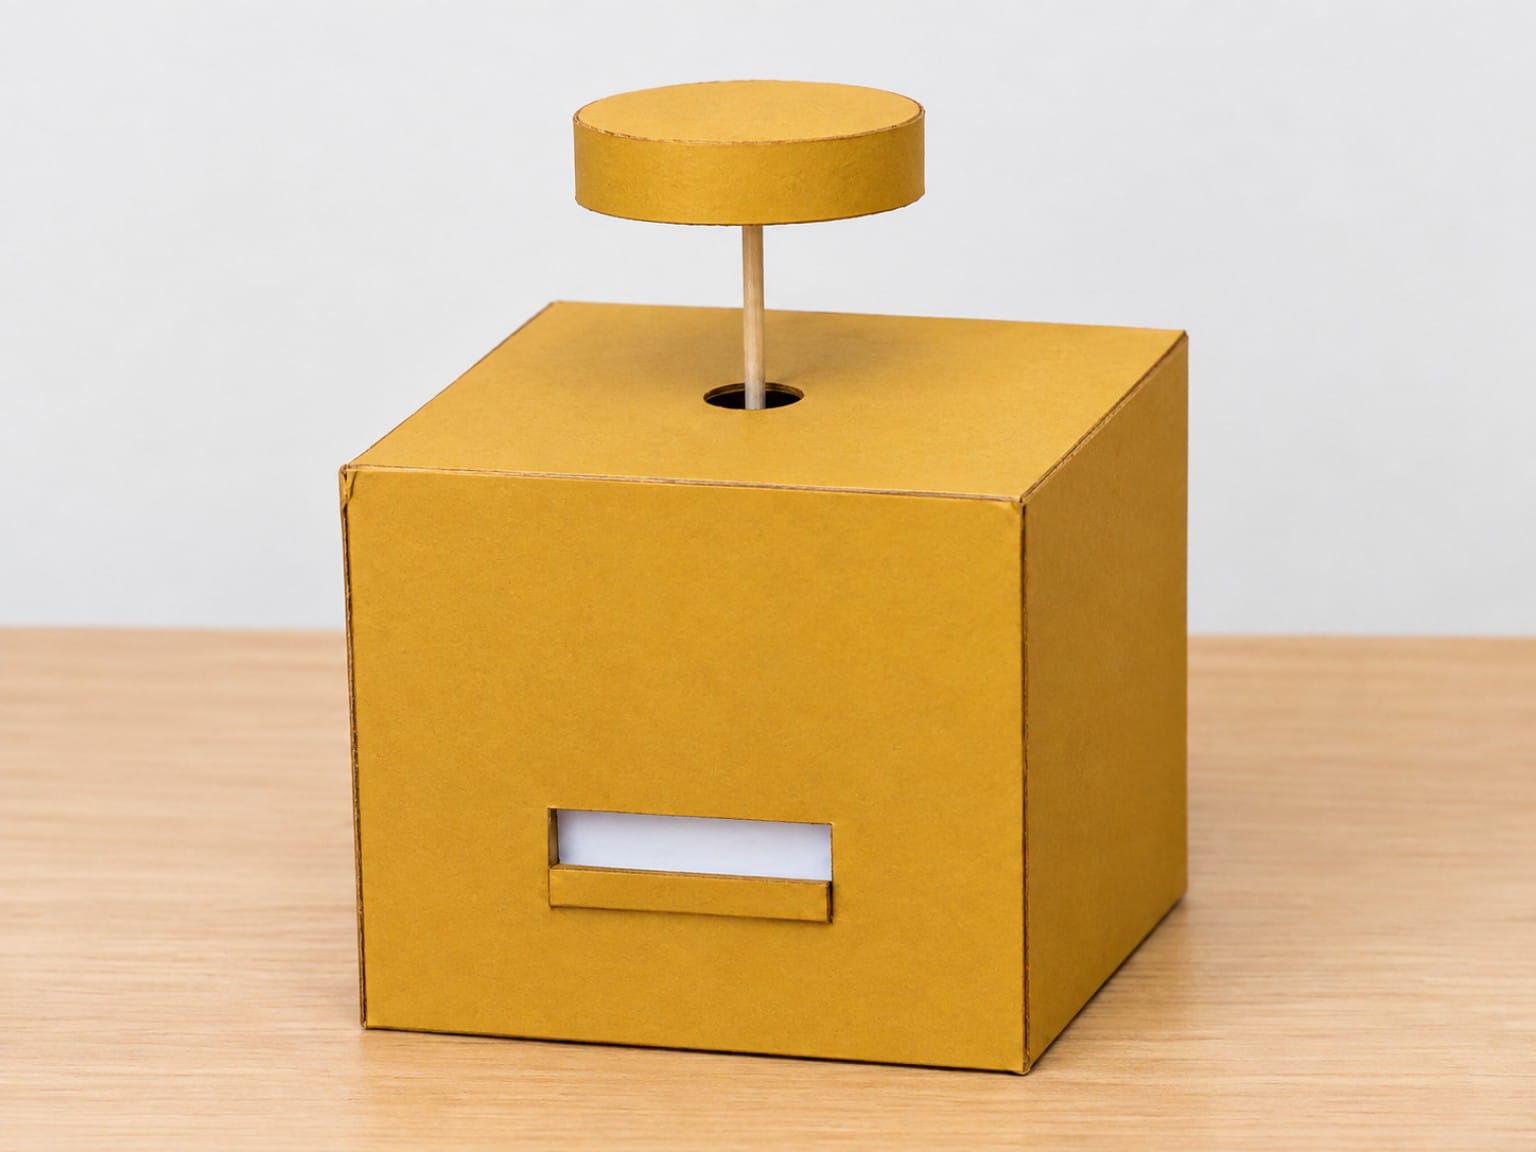
(i) Coin Bank – Completed Model

  • Cardboard pieces are assembled to form the box-shaped structure.
  • The stick and circular pieces are fixed to the top.
  • The bottom section can be opened to remove the saved coins.

Sample Output – Completed Coin Bank


(ii) Decorated Coin Bank
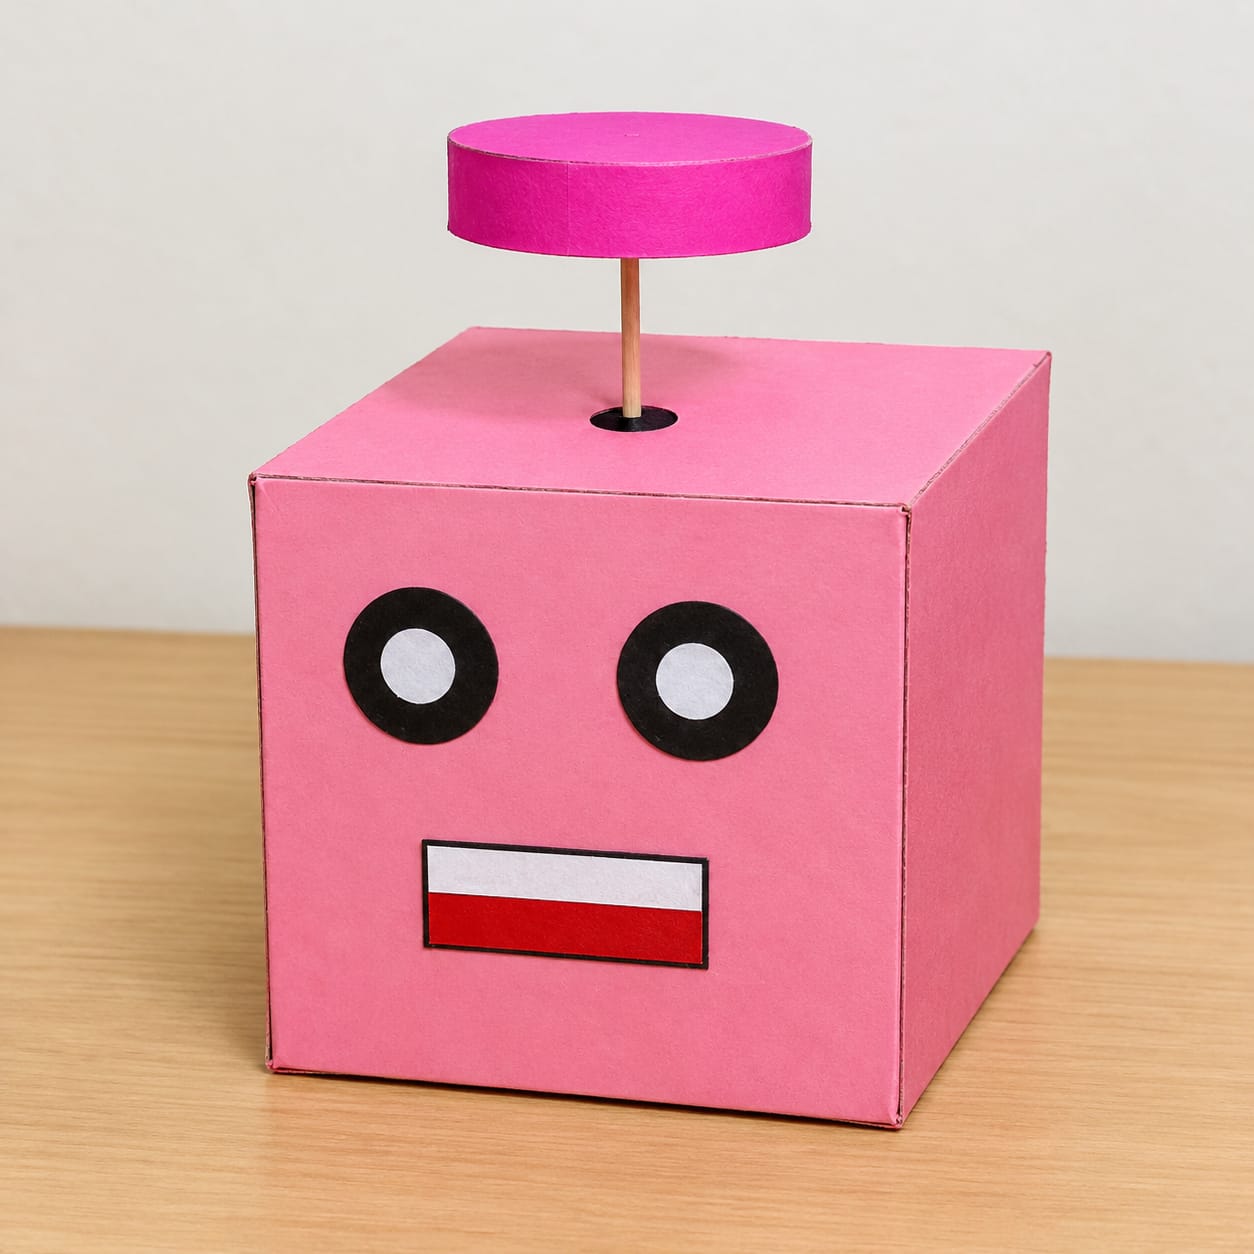
  • The completed Coin Bank is decorated using coloured paper, colours, sketch pens, or other craft materials.
  • The final model is ready to use as a simple coin-saving bank.

Sample Output – Decorated Coin Bank

πŸŽ₯ MAKER’S LAB VIDEO

Watch the Maker’s Lab video to understand the Coin Bank project and its construction.

▢️ Watch the Coin Bank Project Video

ADDITIONAL NOTES

Keep the following points in mind while making and using the Coin Bank.

  • Handle scissors and cutters carefully.
  • Ask an adult for help when using a cutter or glue gun.
  • Keep the working area clean while cutting and assembling cardboard.
  • Allow glue to dry properly before handling the model.
  • Do not use excessive glue, as it can weaken or bend the cardboard.

SAFETY

  • Handle scissors and cutters carefully.
  • Ask an adult for help when using a cutter or glue gun.
  • Keep the working area clean while cutting and assembling cardboard.
  • Allow glue to dry properly before handling the model.
  • Do not use excessive glue, as it can weaken or bend the cardboard.

CREATIVITY EXTENSION

  • Design the Coin Bank in different shapes and themes.
  • Add colourful borders and patterns.
  • Create separate sections or labels for different types of coins.
  • Use recycled cardboard and paper to make an eco-friendly Coin Bank.
  • Add a name label to personalize the Coin Bank.
  • Create an animal-shaped or cartoon-themed Coin Bank.
  • Write motivational messages such as β€œSAVE TODAY, SMILE TOMORROW!”

LEARNING OUTCOME

After completing this project, students will be able to:

  • Measure and cut cardboard accurately.
  • Assemble different cardboard pieces to create a structure.
  • Use glue and craft materials effectively.
  • Develop creativity through product decoration.
  • Understand the importance of saving money.
  • Create a useful product using simple and easily available materials.
  • Understand how simple movable parts can be incorporated into a model.

Leave A Comment

Your email address will not be published. Required fields are marked *