DIY BEGINNER PROJECT NO.06 (TWIN PILLAR BRIDGE)

Twin Pillar Bridge | Project Repository
PROJECT REPOSITORY

Twin Pillar Bridge

Design and build a Twin Pillar Bridge model using cardboard, two LEDs, resistors, connecting wires, and a 9V battery. The project demonstrates how a parallel circuit works and how multiple lights can glow simultaneously.

Note: Please read the full instructions before making the product.

Category

DIY Electronics Project

Level

Beginner

TABLE OF CONTENTS

AIM

To design and build a Twin Pillar Bridge model using cardboard, two LEDs, and a battery, where lights on both sides of the bridge glow simultaneously using a parallel circuit.

OBJECTIVE

This project helps kids understand the basics of:

  • Simple electric circuits
  • Parallel connection of LEDs
  • Polarity of LEDs
  • Use of resistors to control current

The goal is to demonstrate how real bridge lighting systems work, where multiple lights glow together without using a switch.

MATERIALS REQUIRED

Material Quantity
Cardboard / Foam board For bridge road and pillars
LEDs 2
Resistors 2 × 1 kΩ
9V Battery 1
Connecting Wires As Required
Glue Gun / Strong Adhesive As Needed
Scissors / Cutter 1
Markers / Colour Paper For Decoration

CIRCUIT DESIGN CONCEPT

★ Each bridge pillar has one LED fixed on top.

★ The LEDs are connected in a parallel circuit.

★ Each LED has one resistor in series to protect it.

★ The battery supplies power directly to the circuit.

★ When the battery is connected, both LEDs glow together.

💡 WHAT THIS PROJECT DEMONSTRATES

  • Simple electric circuits
  • Parallel connection of LEDs
  • LED polarity
  • Use of resistors to control current
  • Real-life bridge lighting systems

PROCEDURE

Follow the steps below carefully to assemble the Twin Pillar Bridge.
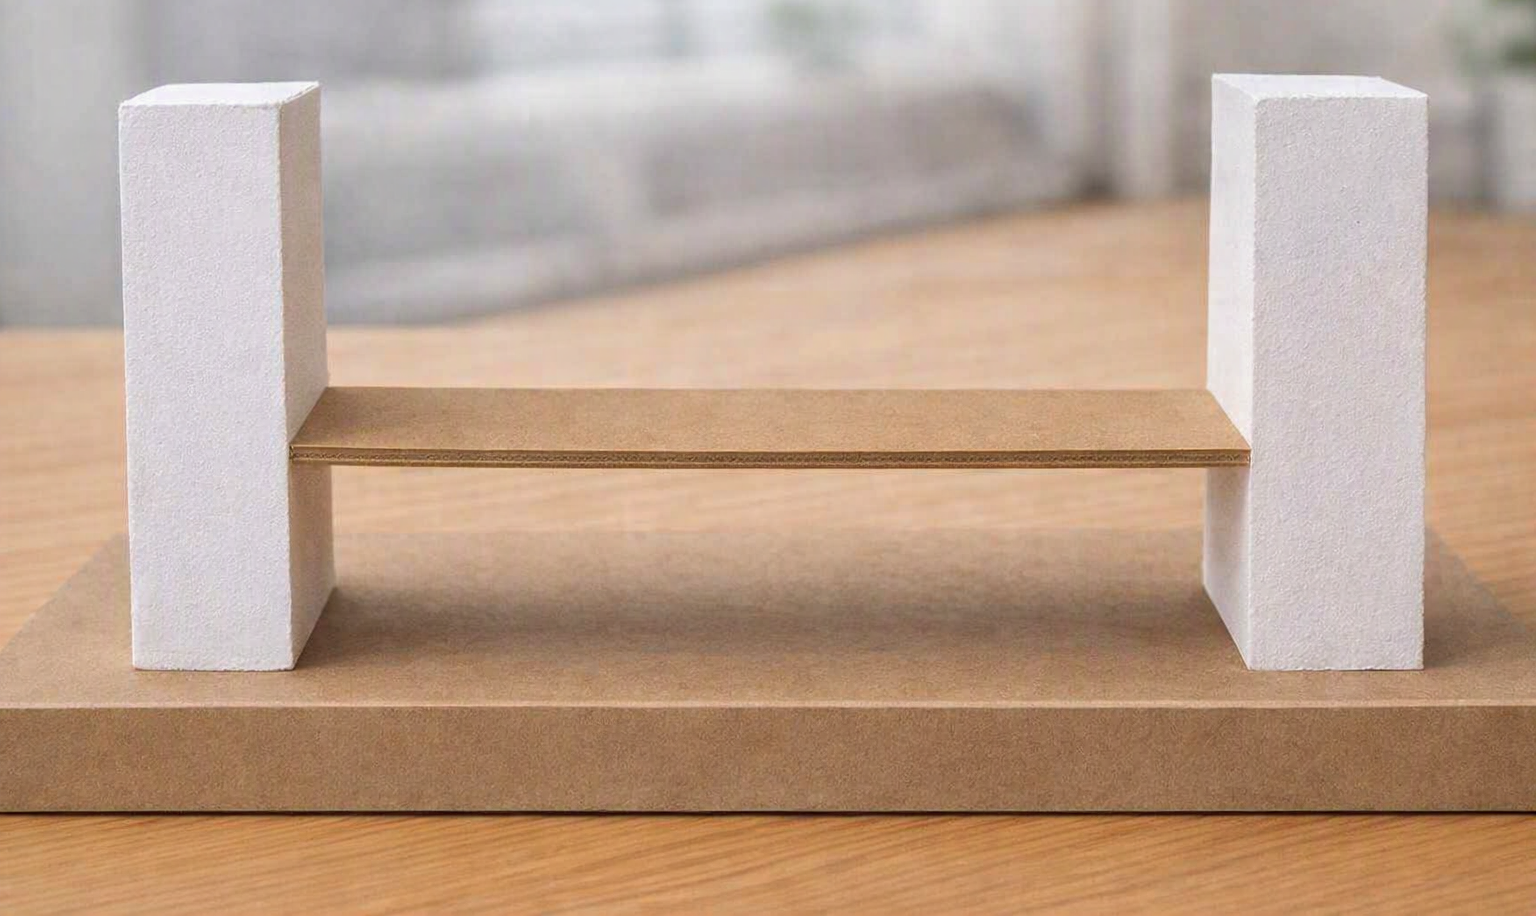
STEP 1

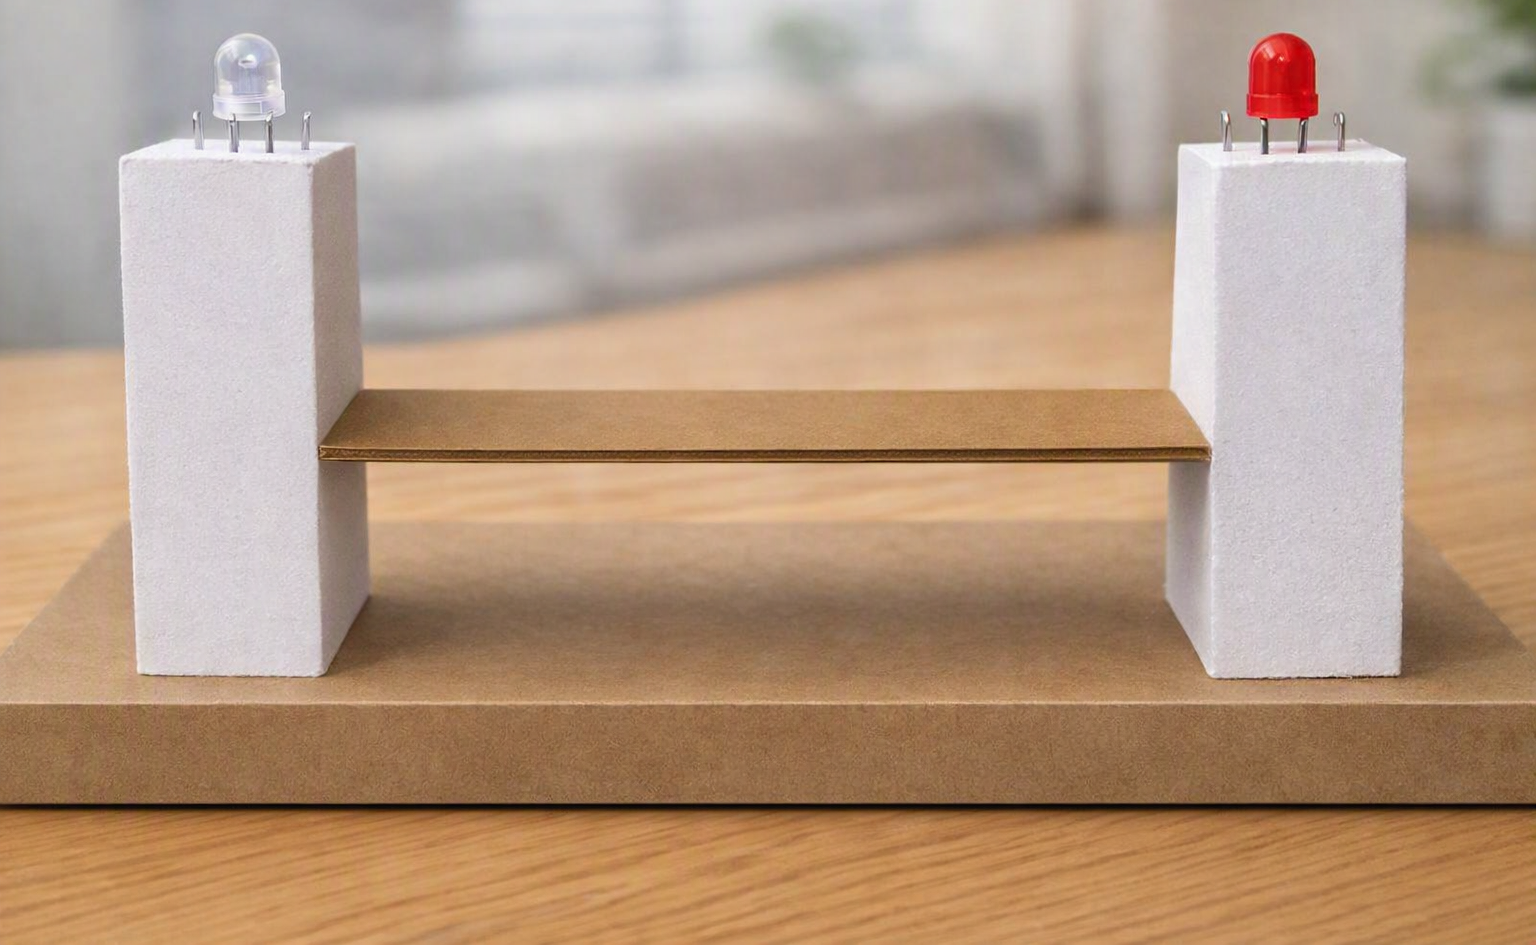
BUILD THE BRIDGE STRUCTURE

  • Cut a long rectangular piece of cardboard for the bridge road.
  • Create two vertical pillars using cardboard or foam board.
  • Fix one pillar on each side of the bridge firmly.

💡 TIPS & ALTERNATIVES

  • Make both pillars the same height for a balanced bridge.
  • Thermocol, chart paper, or ice-cream sticks can also be used.

Step 1. Build the Bridge Structure

STEP 2

FIX THE LEDs

  • Fix one LED on top of each pillar to act as bridge lights.
  • Keep the LED legs visible for wiring.

💡 TIPS & ALTERNATIVES

  • Long leg = positive (+), short leg = negative (–).
  • Use LED holders, tape, or clay if glue is not available.

Step 2. Fix the LEDs

STEP 3

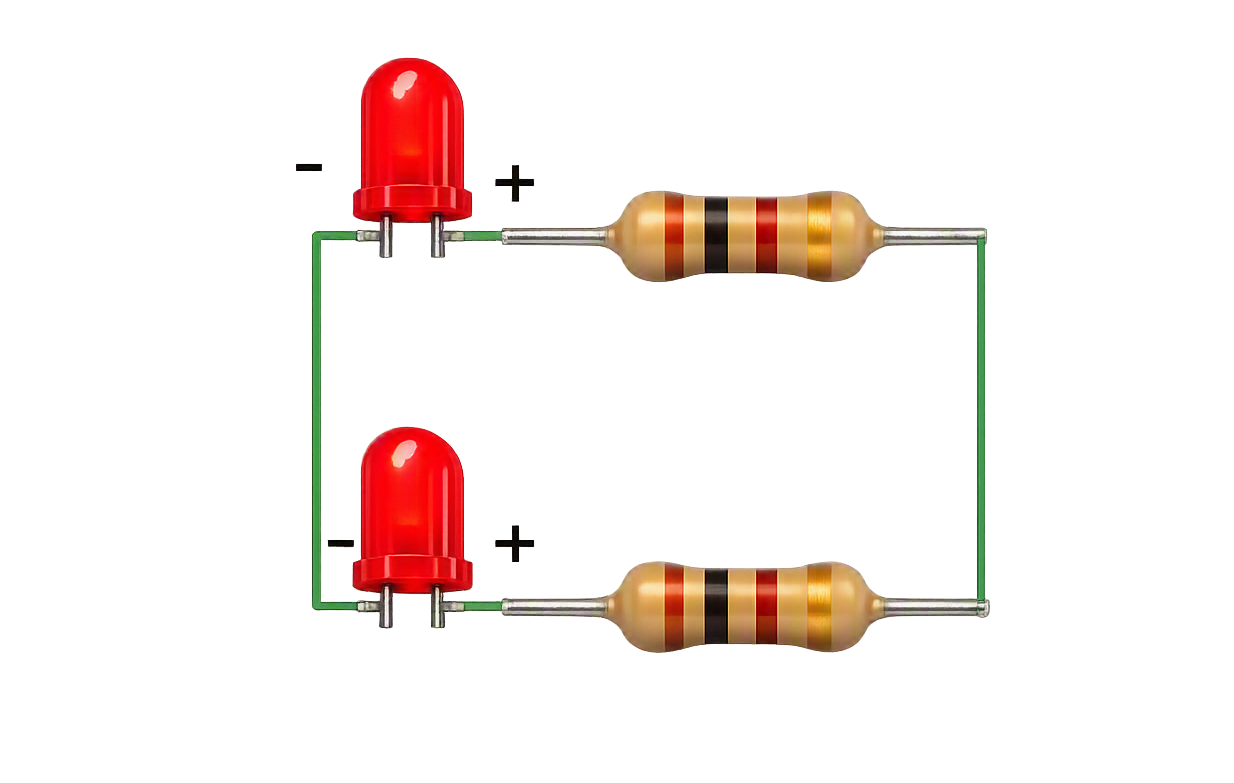
CONNECT THE LEDs IN PARALLEL

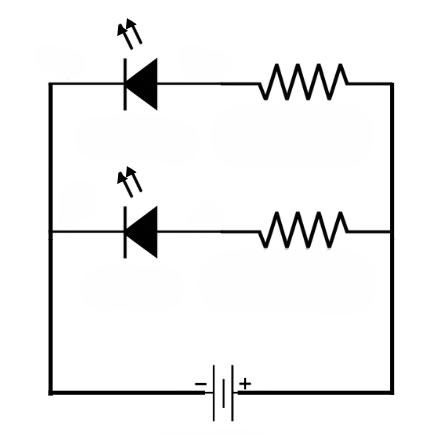
  • Connect both positive legs of the LEDs together.
  • Connect both negative legs of the LEDs together.
  • Attach one resistor in series with each LED on the positive side.

💡 TIPS & ALTERNATIVES

  • Never connect LEDs directly to the battery without resistors.
  • If a 1 kΩ resistor is not available, use 220 Ω or 330 Ω.

Step 3. Connect the LEDs in Parallel

STEP 4

CONNECT THE BATTERY

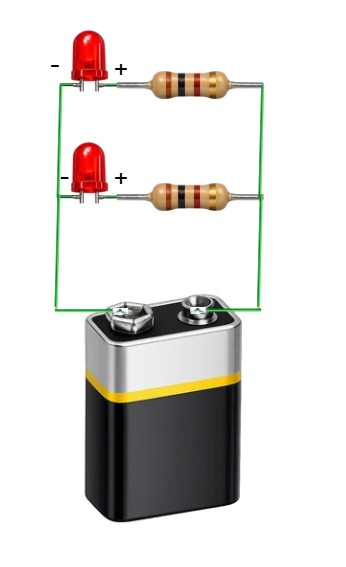
  • Connect the joined resistor ends to the battery positive terminal.
  • Connect the joined negative LED legs to the battery negative terminal.

💡 TIPS & ALTERNATIVES

  • Check LED polarity before final fixing.
  • Use 2–3 AA batteries instead of a 9V battery if required.

Step 4. Connect the Battery

STEP 5

FINISHING & DECORATION

  • Hide the battery under the bridge.
  • Arrange wires neatly.
  • Decorate the bridge using colours, lanes, or railings.
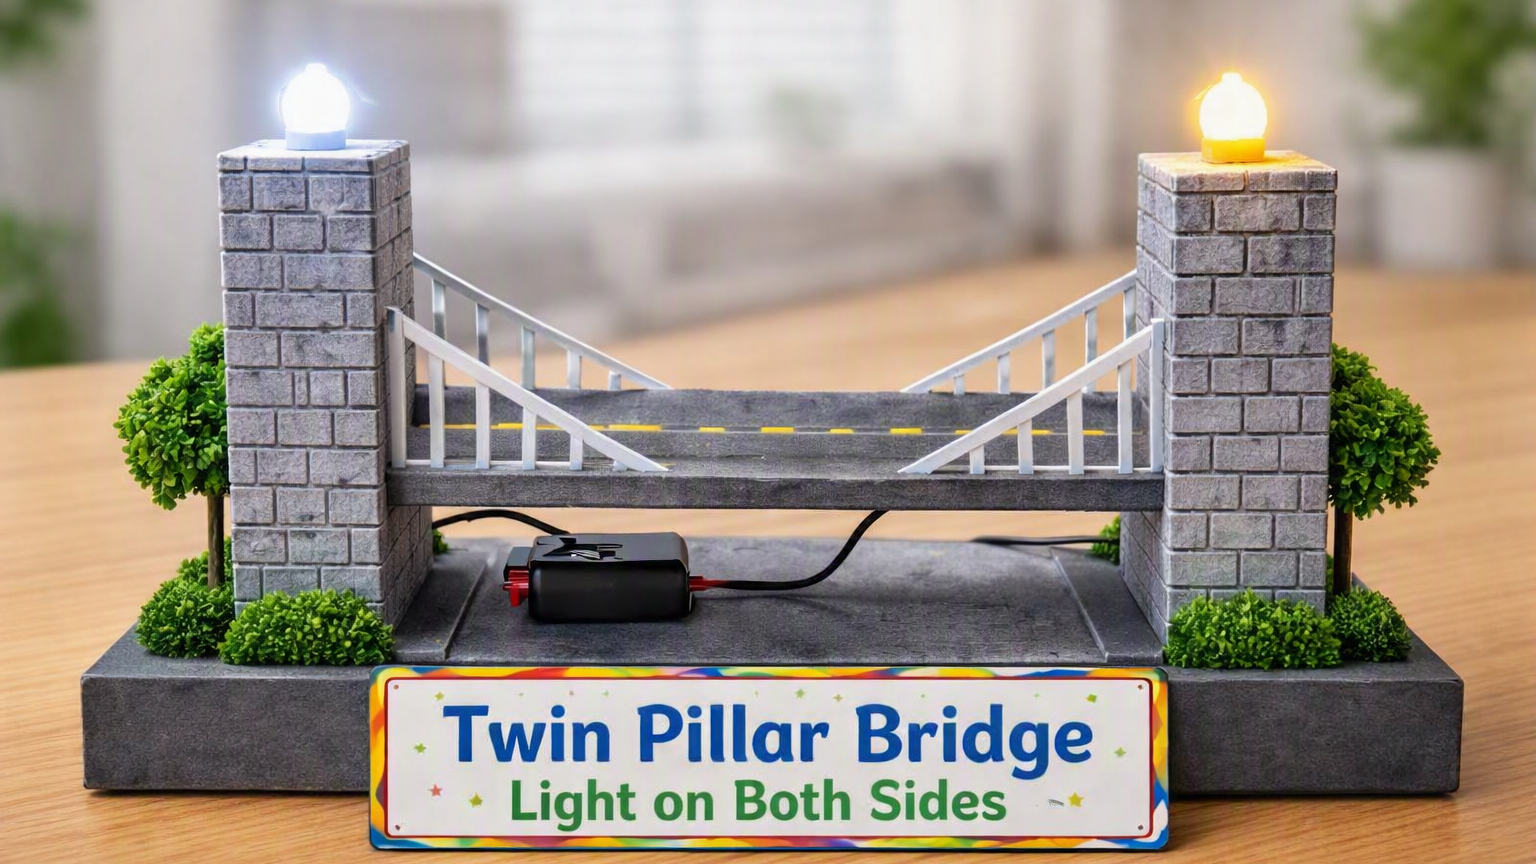
  • Add a title label: “Twin Pillar Bridge – Light on Both Sides”

💡 TIPS & ALTERNATIVES

  • Secure wires properly to avoid loose connections.
  • Add paper railings, road markings, or side walls for better appearance.

Step 5. Finishing & Decoration

CIRCUIT DIAGRAM

Figure 1. Circuit Diagram of the Twin Pillar Bridge

WORKING PRINCIPLE

When the battery is connected, the circuit is completed and current flows through both LEDs. Since the LEDs are connected in parallel, each LED receives equal voltage and glows at the same time. The resistors limit the current and protect the LEDs from damage.

FINAL RESULT

  • Both bridge pillar lights glow instantly.
  • LEDs glow equally on both sides.
  • A neat and attractive bridge model is created.

Kids will learn about:

  • Parallel circuits
  • LED polarity
  • Use of resistors
  • Real-life bridge lighting applications

SAMPLE OUTPUT

Sample Output – Twin Pillar Bridge

ADDITIONAL NOTES

🎯 GAME / ACTIVITY CHALLENGE

The bridge with the brightest and neatest lighting wins!

Bonus points for:

  • Clean wiring
  • Strong bridge structure
  • Best decoration
  • Proper use of resistors

SAFETY

  • Always use a resistor with LEDs.
  • Do not short-circuit the battery.
  • Handle scissors and cutter carefully.
  • Switch off power after testing.

CREATIVITY EXTENSION

Kids can enhance their Twin Pillar Bridge model by adding simple creative elements while keeping the same circuit concept.

  • Add more pillars with LEDs connected in parallel to represent a long bridge.
  • Use different LED colours such as red, blue, and white to simulate real bridge lighting.
  • Design road markings, footpaths, or side railings using paper or tape.
  • Add name boards or sign boards on the bridge using chart paper.
  • Create a river or road scene below the bridge using colour paper or drawings.
  • Try decorative covers over LEDs using transparent paper or plastic to diffuse light.
  • Challenge students to make the bridge stronger using folds or layered cardboard.

EXTRA CHALLENGE

🧠 THINK & EXPLAIN

Ask kids to explain how the circuit will change if one LED stops working and why the other LED still glows in a parallel circuit.


Leave A Comment

Your email address will not be published. Required fields are marked *